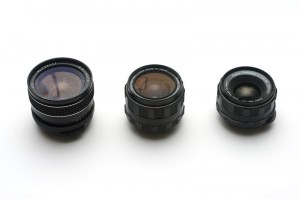
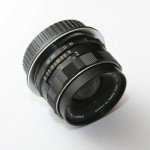
So, after spending maybe-a-little-too-much time on eBay I’ve got 3 wide-angle M42 screw-mount lenses to choose from. I didn’t intend to get two 28mm lenses, but I bid on a couple of lenses where the descriptions were vague and the photos were out of focus – lucky I didn’t end up with a couple of paperweights I guess. Here they are together with the 35/3.5 Super Takumar I already had, for size comparison:
Category: General
Chili-Cheese Omelet
I’ve since surpassed even this, but for a couple of weeks this was the Best Breakfast Ever. The title and photo should explain it all, but I’ll provide a quick recipe.
Chili: Normally, I prefer a braised beef chuck chili. I don’t use masa harina, tortilla chips, or any other evil corn product so it turns out a little watery. For this application I think something thicker and drier works better. Lentils thicken and suck up moisture and combine with ground beef for a nice texture. Any type of lentil works fine. I soak mine for a few hours in a lemon juice and water mixture, which I’ve heard reduces gassiness. I rinse the lentils and put them in a pot with water just over them, cover and simmer for 30 minutes or so. Meanwhile, I saute some onions and a maybe some peppers, chopped for consistent texture. Once those are soft I add some ground beef and the herbs and spices. For chili I like ground cumin and coriander, oregano powdered between my fingers, paprika, chili flakes, black pepper, and maybe cayenne or just some hot sauce. Once that’s all melded together and the beef appears cooked I add most of an 8 ounce jar of hot salsa. This is an awesome tip from Good Eats – you get tons of flavor and a bunch of vegetation without having to pick up a knife. There’s really no need for the sauteed onion and pepper earlier with the salsa. Once that’s bubbling along, check the lentils for doneness and dump them in. It’s no problem if there’s extra liquid with the lentils – it’ll cook off. Simmer a while and check the flavor, adding salt, hot sauce, or pepper if needed.
Omelet: I’ve made omelets the “right” way and they’re nice, but I think this way is better. Maybe it’s not even an omelet – I don’t care. You’ll need a small non-stick skillet, hopefully the only non-stick thing in your kitchen, except for maybe a crepe pan. Heat some butter over medium heat. Whisk 2-5 eggs until fluffy, optionally with a bit of creme fraiche. When the butter foams shake it around the pan to evenly coat and pour in the eggs. Turn on your broiler, placing the top rack so your omelet pan will be a couple of inches from the heat. Pretend you’re making scrambled eggs, mixing the eggs as they cook, but stop before they’re all set. Grate on some cheese and place the pan under the broiler. Watch it carefully – when it’s done it’ll be set, puffy, and golden brown and the cheese will be melted.
Pour some hot chili on top of the omelet for the Best Breakfast Ever (for now).
About two weeks ago I went camping at Little Bennett Regional Park, mostly to see if motorcycle camping was something for me or not. The camping and motorcycling were great, and I went for a long hike around the park while I was there. If you don’t like crowds and don’t want to drive far from DC, it seemed like a great place to go camping and hiking. There were a few biting flies around, but not enough that I regretted not having bug repellent. My 60 Hikes Within 60 Miles: Washington DC guide book made the horses-allowed parts of the trails sound rough, but it didn’t seem like there were a lot of horse-riders around either.
I hiked in shorts, a t-shirt, and running shoes – appropriate for the 85-ish temperature I thought. Afterwards I changed into my usual motorcycle gear, including extra socks and tall boots, and rode back. When I got back I presume I took off the socks at some point. I found some bug bites on my shin but didn’t notice anything else that day. The next night, at least 24 hours after I’d been walking in the woods, I noticed something on my leg, near my ankle. Assuming it was either dirt or an ingrown hair, I scraped it with a fingernail and pulled it off. Fortunately, I looked at it before flicking it into the trash – and saw it was a tick. It wasn’t black like the ones I’ve seen before, but had some light-colored parts and maybe some brown parts. It wasn’t full of blood and it looked pretty dead. So, I’d had it on me for a very long time, and I’d removed it pretty roughly.
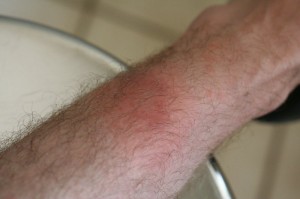
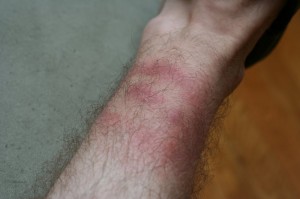
I’d heard of Lyme Disease but I didn’t know what I should be looking for (or how worried to be), so got on the computer and browsed Google’s results for something that sounded trustworthy, like the CDC. The message seemed to be to watch for a circular rash for about 30 days after suspected exposure. Well, Monday when a rash appeared on my leg it took me about 6 hours to remember the tick – guess I should have tattooed a circle around it or something. Here’s what it looked like when I went to my doctor yesterday:
I felt a little like The Elephant Man as she invited an intern, another doctor, and I think a physician’s assistant in to take a look. I was a little unnerved that she based her diagnosis on a single photo in a book of some sort, which showed what the rash might look like maybe a week after it first appears – a circle with healing in the middle. Shouldn’t it show three or four photos of how the rash changes over the course of a week or two? On the other hand, that site the CDC links to appears to only show rashes at about my stage, not the later bullseye thing. Anyway, I’ve got some antibiotics and based on what she said and what I’ve read, I shouldn’t have any long-term problems.
From now on I’ll probably wear pants and a long-sleeved shirt while hiking. Maybe I’ll tuck the pants into my socks. Bug repellent might help, but I hate using it. I’ll certainly check myself a little more closely once I get back from a hike. Given how easily I could have missed seeing the tick at all, I guess I’ll also just watch for the rash after going hiking from now on.
Update… The rash is mostly gone now, but here’s a shot of it a few days ago, when it looked more like a bullseye:
Super-Takumar 135/3.5
After using the 35/3.5 for a while (a day or two) I was hooked, so I’ve started looking around for more M42 lenses. I just got a 135/3.5 Super Takumar and some extension tubes from Collectible Cameras. I decided to order a lens they described as a “9-” because the 35/3.5 from Adorama was an “E+” and I wanted to see if there’d be much difference between “really good” and “not as good.” Optically and functionally, the 135/3.5 is flawless, except maybe the focus feels less smooth than the 35/3.5. I guess I can figure out how to lubricate it if it’s a problem. The 135/3.5 does have a few wear marks on the metal that I don’t care about.
Two photos with the new lens and the longest tube:
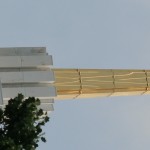
Update: Here’s a shot of the LDS temple that shows how sharp the 135/3.5 is, even with my mediocre focusing skills:
Super-Takumar 35/3.5 & EOS adapter
The combination of retro manual lens and modern digital camera sounded fun for some reason, so I ordered an M42 screw-mount to EOS adapter and a 35mm lens to try out with my Rebel XT. The adapters are available all over the place, probably cheapest on eBay, but I ordered mine from Adorama along with the lens. The lens came with a silly old case that I guess can go on a shelf somewhere. The adapter is silver metal, which totally clashes with the black lens and camera. There are black adapters on eBay if you’re fashion-conscious. There’s also an adapter with a little chip that enables the ‘in-focus’ dot, which can apparently be helpful.
So far I like the lens. It’s a solid chunk of metal and glass, in contrast to inexpensive modern Canon lenses, which are mostly plastic. Even my 28-135 isn’t as solid and tight as the 35/3.5. Focusing can be tough, although with digital it’s easy enough to take a shot, check for focus, and take another if it’s not right. The shooting procedure goes something like this: set the lens aperture at its widest, focus a while, set the aperture where you really want it, make sure your exposure is acceptable with a half-push of the shutter button, then take the shot.
The lens, with the adapter and a Canon rear lens cap attached:
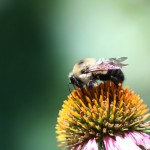
Some purple coneflowers with the lens wide open at f/3.5:
…and at f/16:
Some cherry tomatoes with the lens wide open:
